This post was originally published April 25,2020. It has since been updated as of October 2022. * indicates updated material *
Hi! We’ve made it to week 3 of being furloughed. Honestly unsure what day of the month it is at this point. Yesterday I told my mother I was going to “try” and wake up early today and her response was “Why? It’s the weekend!” Well, when you’re furloughed during an international pandemic, everyday feels like the weekend! To be clear, I did not wake up early and I did snooze my alarm for over an hour.

We are truly living through a future history class lesson right now and I am continuing to navigate this temporary leave from my full-time job as an audiologist/field sales representative for a hearing aid manufacturer.[Curious what an audiologist is? Click Here] Typically I am traveling weekly for work and do not have a lot of free time to set aside for activities and hobbies. While racking my brain for ideas, I decided to look on Instagram for inspiration. As I was scrolling through DIY craft ideas, I stumbled upon an IGTV video “DIY polymer clay earrings”. After watching the video I thought to myself, I can do that! Thank you for following along as I take my first swing at making polymer clay earrings!

For starters, I went to Google and Youtube and searched “How to make polymer clay earrings”, and down the rabbit hole I went!
Where I shopped!
Due to the current status with COVID-19, I found that Amazon had longer wait times than usual. I must confess that patience is not one of my stronger attributes. Therefore, I decided to look elsewhere. This may vary state to state but in Ohio, Michaels currently is offering curbside pick-up and also same-day delivery on some items. Joann Fabric and Crafts is also is offering curbside pick-up and in Cincinnati, the store is physically open and allowing 20 people inside at one time. CHA-CHING! I was back in business and ready to rock and roll!
Supplies and Materials

- Polymer Clay – There are so many options of colors! I got slightly carried away but I picked up the following colors: pearl, white, opal, jewelry gold, elephant gray, granite, black, twinkle twinkle, graphite, tan, hazelnut, and sky blue.
Click Here for solid colors
Click Here for colors that already have a shimmer blended into the clay
Click Here for a multi-pack if you want to try out a few colors before committing to a larger pack
*If you are unsure what colors to choose, stick with the primary colors, white and black. It may add an extra step, but you can make your own shades by mixing colors together!
- Rolling Pin – I am currently using the fondant roller linked below. There is an actual Sculpey Clay roller as well. (You can absolutely use a rolling pin from your kitchen, just avoid wood as it will absorb oils from the clay and the wood grain may leave marks in the clay)
Click Here for fondant rolling pin *Also available here at Amazon for much cheaper! *
Click Here for Sclupey Clay roller (available at Joann)
Click Here for Sculpey Clay roller (available at Amazon)
Click Here for clay roller and acrylic board (Amazon)
* You can also use a textured rolling pin to give your clay a unique pattern. Here is an example available at Michaels!
- Clay machine/ pasta maker – This is optional but if you have a pasta maker lying around or are committed to making clay jewelry, these will make rolling out the clay in even sheets very easy!
Click Here (available at Michaels)
Click Here (available at Joann)
Click Here (available at Amazon) I have this one!
- Knife or clay cutter -I am currently using an X-ACTO Knife
Click Here (available at Michaels)
- Cookie cutters or clay cutters – this is optional, but makes shaping earrings much easier! I’ve purchased both from Michael’s and Etsy.
- Jewelry pliers – You can use pliers that may be laying around your garage or in a toolbox! I was lazy and didn’t feel like hunting mine down and cleaning them off)
Click Here (available at Michaels)
- Jewelry jump rings: I suggest going with a larger size so that you won’t have issues getting the ring through the clay. I have been using 6 and 7mm.
Click Here (available at Michaels)
Click Here (available at Joann)
Click Here (available at Amazon)
*Here is also a kit from Amazon that includes jump rings, pliers, and tweezers.
- Earring posts and backs. You will need these to adhere to the back of your earrings.
Click Here for posts and Click Here for backs (available at Michaels)
Click Here (available at Joann)
Click Here (Available at Amazon)
- Super glue – I went with Loctite Ultra Gel Control Super Glue.
Click Here (available at Michaels)
Click Here (available at Amazon)
- Cutting surface – I just laid parchment paper on top of my granite counter top, but you could use a cutting board or a clay crafting mat. The mat linked below can also go into the oven allowing you to use the same service the entire time!
Click Here for “Work N Bake Clay Mat (available at Joann)
Click Here for “Work N Bake Clay Mat (available at Amazon)
- Parchment paper – used for rolling out clay and for baking on.
- Cookie sheet – used for baking
Additional Optional Materials
The following products are not necessary but will allow you to add even more detail to your earrings.
- Gold Leaf Foil Flakes -I absolutely love the look this adds
Click Here (available at Michaels)
Click Here (available at Joann)
Click Here (available at Amazon)
- Clay Glaze – Not necessary but I think it gives your jewelry a much more professional look. I went with the “satin glaze”. There are several different glaze styles available. I am tempted to try the “glossy glaze” next!
Click Here (available at Michaels)
Click Here (available at Joann)
- Clay tools – Not necessary but if you want to add texture or pattern to your clay, these can come in handy! I personally felt the items available at Michaels’ and Joann’s were overpriced for what they offered so I purchased mine off of Amazon and they arrived today!
Click Here (available at Amazon)
- Small Paint Brushes – can be used for painting on glaze or for using acrylic paint to add embellishments
Click Here (available at Michaels)
- *Dremel Tool – I did not purchase this initially but as I have continued to make clay earrings, I find this tool incredibly easy to use to drill holes through baked clay and to smooth/buff out the edges.
Click Here (available at Amazon) I purchased this one
Click Here (available at Target) I also purchased this one as a second tool earlier this year (2022)
- Gold or Silver Charms – completely unnecessary if you are just starting out, but if you want to add a little “bling” to your pieces, you can find an endless amount on Etsy.
- *UV Resin and UV Light – This is another item I did not add on until after I had been making clay earrings for several months. UV resin is cured using a UV light. It will give your clay a nice, smooth glossy finish.
Note, Resin can be toxic. If using resin, be sure you are working in a well ventilated area and are wearing personal protective gear (mask, gloves, etc).
Click Here for UV Resin (available at Amazon)
Click Here for UV Light (available at Amazon)
Basic Technique for Creating Clay Earrings

Before you begin, ensure your work space is clean and free of dust, pet hair (lol!) and that your hands are clean. Note- if you are jumping between dark colors and light, you will want to clean hands between otherwise the dark color will transfer onto the lighter colors. You can also use a baby wipe or makeup wipe if you want to avoid washing hands each time.
1. Start by warming up your clay, roll between your hands. You will notice as the clay heats up it begins to become easier to work with.

2. Take your rolling pin or clay machine and roll clay out until it is about 1/4 of an inch thick. You don’t want the clay too thick as it will make it challenging to put the jump ring through. You also do not want it too thin as you run the risk of breaking the clay after it has baked.
3. Use your cookie/clay cutters to cut out shapes or use your own hands to create earring shapes and designs.
Note during this step is where you can use a textured rolling pin, clay tools, gold leaf foil, etc.

4. Poke hole in clay where the jump ring will go through. You can use a paper clip, sewing needle, or in my case, I used the pointy end of a corn skewer, haha! From my experience, you need to make the hole slightly larger than you think, but not so large that you have a gaping hole.


5. Bake! Read the directions on your clay packaging as different brands and styles have various baking times. For mine, it was 275 °F/ 130 °C for 15 minutes.
Note: when they first come out of oven the clay should still be slightly pliable, they will fully harden once they cool.
6.Optional step: Once cooled, if you are using a glaze, you will want to coat your earrings using a paint brush. Make sure the hole for the jump ring does not fill up with glaze, you can take your tool used for initial poking the hole through the clay to prevent glaze from sticking in the hole.

7. Once the glaze has cooled, you will need to secure the jump ring. I took 1 set of pliers to open the jump ring and feed it through the hole in the clay. You will then need to feed it through the hole in the second piece of clay. To close the jump ring, I found it easiest to use two sets of pilers and push the ends of the jump ring back together.


8. Lastly, all you need to do is attach your earring posts! I found a little glue goes a very long way! I squirted my Gorilla Glue on a piece of parchment and very lightly dabbed the flat portion of the earring post in the glue. I then placed it on the back of the earring and held it in place for a few moments.
Note, if you use too much glue, you may find your earring post begins to slide around, if this happens, you will need to hold the post in place longer until the glue begins to dry.


Specificity techniques
Marble-Effect:
1. Roll out initial sheet of clay (this will be your main color)
2. Roll out a second color (this will be your accent color)

3. Take the accent color and tear of small portions of the clay. Then stick these on your main sheet of clay. You will want to cover both sides of the clay. You can also use multiple colors if you want a more dramatic or colorful effect.
4. Take your rolling pin or clay machine and flatten the clay again with the new color splotches added on. [Note: you can stop here and use this pattern for a more “splotchy” look if you’d like!]


5. Now take the clay and roll it up into a ball. For this step there really is not a wrong way to do it, you just want to lightly mix the clay together. Do not over mix as you want the accent color to still be prominent.


6. Roll clay back out. Voila! Your clay should now have a marble look to it.


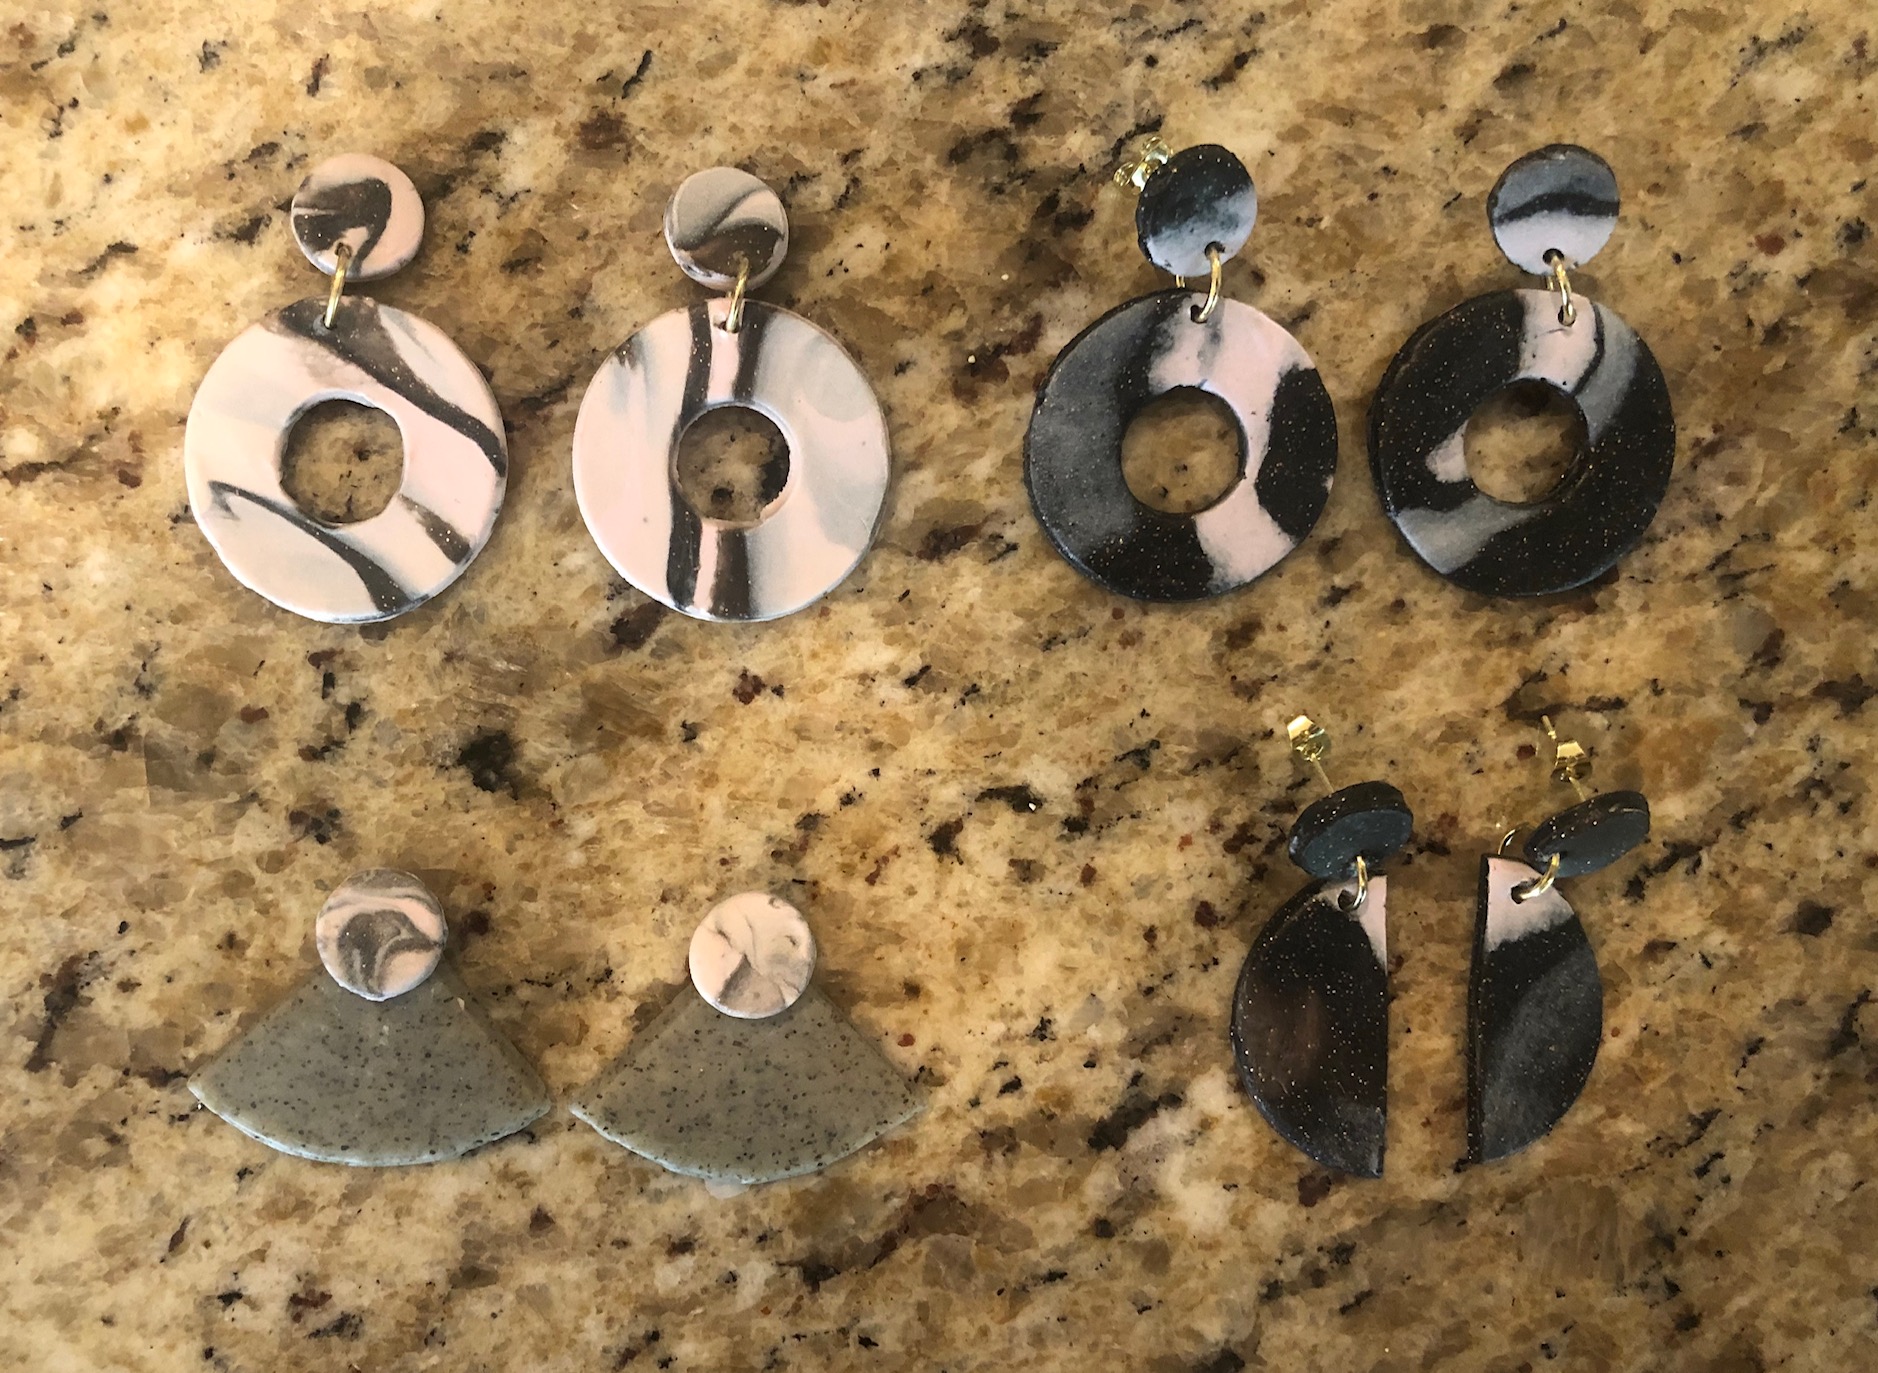
Here are other examples using the marble technique

Polka-dot/ Splatter Effect:
1. Roll out initial sheet of clay (this will be your main color)
2. Roll out additional colors (these will be your accent color)
3. Take you accent color and roll the thin sheet into a long, skinny cylinder

4. I used the edge of my X-ACTO knife to cut small pieces off the edge of the cylinder (think cutting cookie dough from a loaf). Then place these on your initial sheet of clay.
5. If you want a slightly splatter effect, you will want to take your rolling pin and lightly go over your clay sheet. (Like I did in step 4 of the marble effect) If you want a more polka-dot effect, leave the clay dots in tact.

Note: After your clay has baked and cooled, you can also use acrylic paint if you want to add polka-dots of any additional patterns or lines on your jewelry. If you choose to use acrylic paint, be sure to add a glaze finish over it once paint has dried.
Gold Leaf
From what I have read. online, you can add the foil flakes before or after baking. I personally have found it easier to add before baking as the baking process helps lock the foil in place.
1. Tear or cut up foil flakes into small pieces.
2. Use finger or tool to gentle place flakes sporadically on clay

3. Once baked and completely cooled, paint a thin coat of glaze over entire earring.

For additional resources, I have linked websites and Youtube videos I found beneficial!
Article:
1. Sculpey: A guide to Making Oven-Bake Clay Earrings
Videos:
1. Ferne.Atelier – This gal’s jewelry is seriously goals!
2. 3 Easy Geometric Earring projects – This video will give you inspo for different styles!
3. 9 Easy DIY Clay Earrings – great video to see exactly how to get the marble-effect
3. DIY Modern Faux Leopard – for all my animal print lovers!
4. Here is another animal print video – personally felt the video was a little wordy, but you can click forward and get the gist of it pretty quickly!
There you have it! If you have any questions, leave a comment below! Be sure to subscribe and tune in for next week’s Furloughed & Fabulous hobby 😉
-Ronnie
Interested in other DIY projects? Click here
